Geotab Install and Support

From First Plug-In to Full Rollout

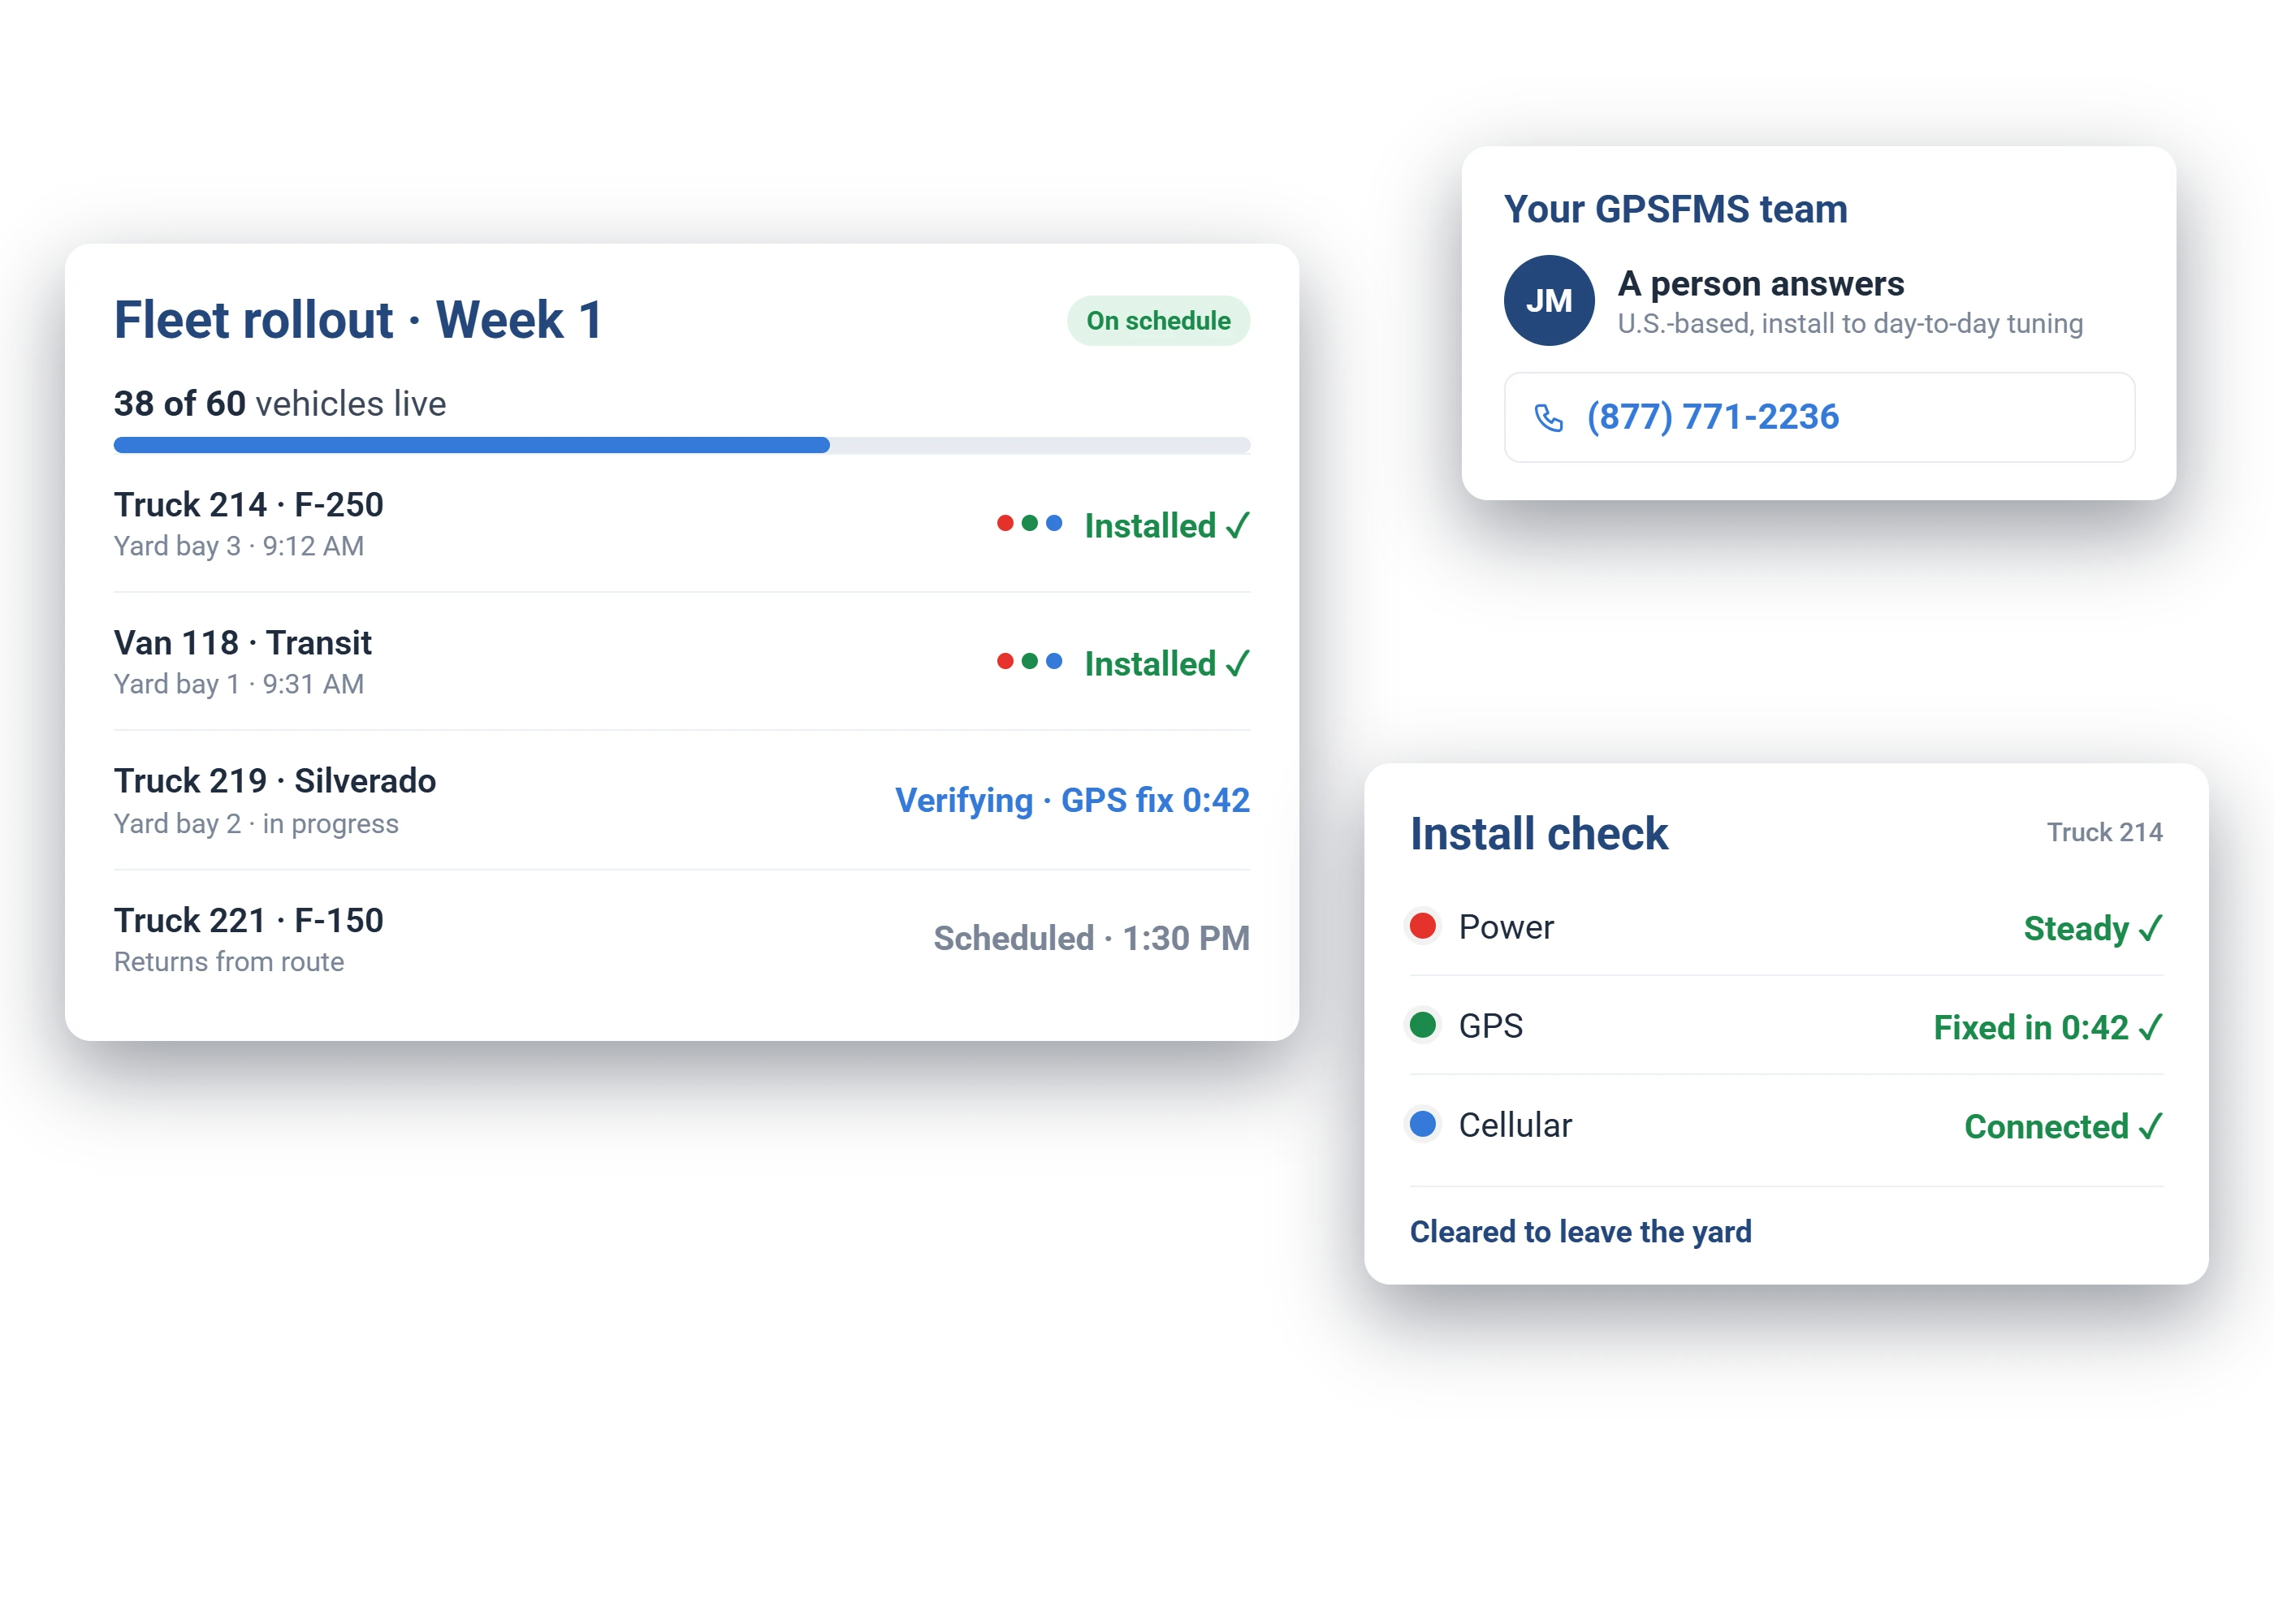
You do not get a ticket number, you get a U.S.-based team, from first install to day-to-day tuning.
A Geotab GO9 being plugged into the OBD-II port

Device Installation Support

Find Your Device's Install Guide

Before the box ships

The Right Harness, Settled at the Desk

Most install problems are really harness problems, so we solve them before anything ships, not under the dash.

Many vehicles need no harness at all

A standard GO9 is itself a 16-pin device; on 16-pin OBD II vehicles with a 12V system it usually plugs straight in. Where a harness is needed, a universal T-harness keeps the diagnostic port free.

Heavy trucks are a lookup, not a guess

Freightliner, International, Kenworth, Mack, Peterbilt, Volvo, Western Star and the rest are matched to the correct harness by make, model, and year. Both OBD II and RP1226 diagnostic ports are supported.

Known gotchas are pre-solved

24V vehicles and 12V Volvo and Mack engine vehicles get a heavy-duty adapter with the 16-pin universal harness, per Geotab's product advisory. You do not need to know that; we do.

GO Rugged has its own harness family

Dedicated HRN-R series weatherproof harnesses, never a standard one that "probably fits."

Upgrading from a GO8 or older?

Older hardware predates today's harness standards, so we confirm the right current harness for your make and year as part of the upgrade. Cheap insurance against a mystery no-power call.

Safety, plainly

Use only Geotab-approved harnesses from authorized channels. Non-approved cables are a documented fire and injury risk, and we will not install one.

California fleets: every applicable install includes placing the CARB Executive Order (EO) label in the engine compartment near the emission control label, so the vehicle passes its Smog Check inspection without a conversation.

Ready on arrival

It Arrives Ready to Install

Everything ships matched to your vehicles and pre-checked. No guesswork under the dash.
Try Geotab free on your fleet
Geotab GO device family

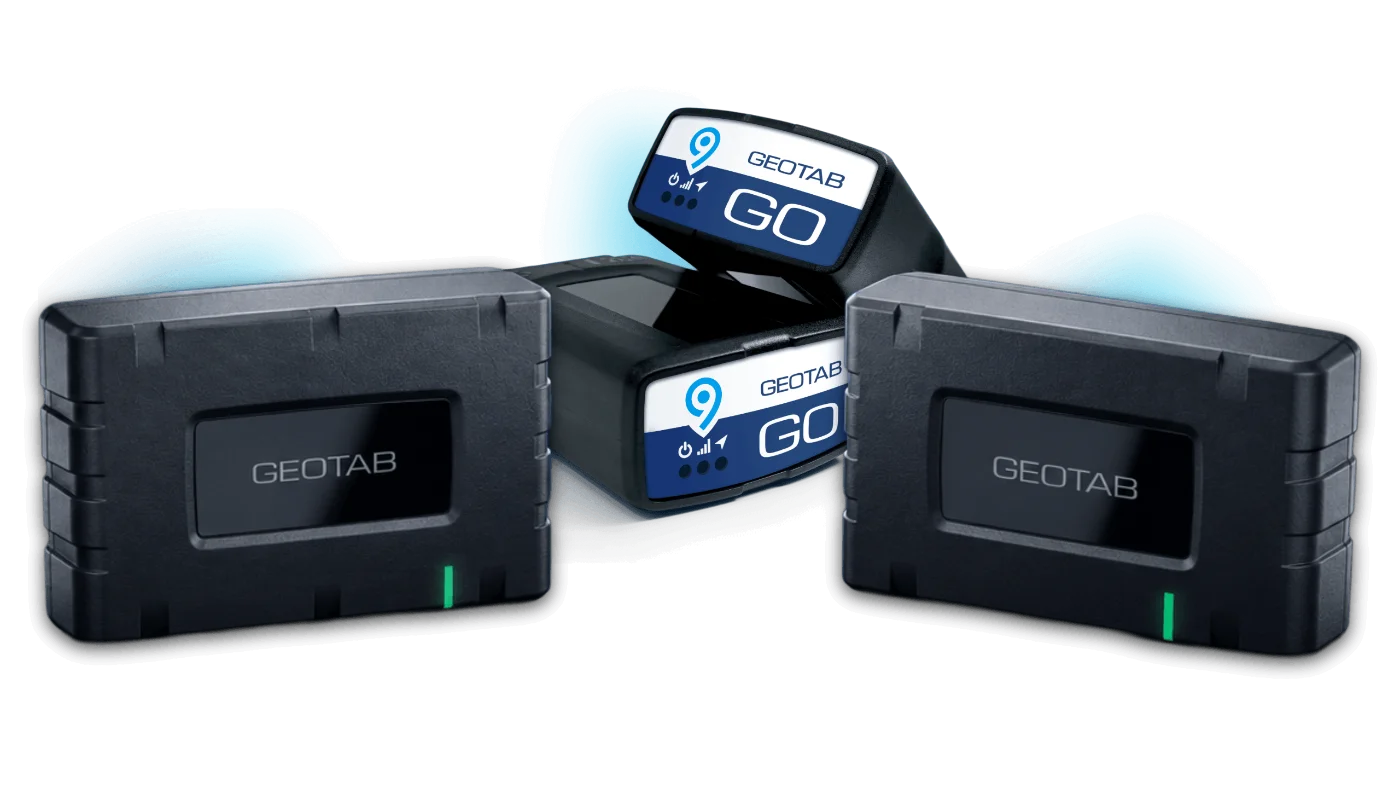
Geotab GO9 / GO10

GO Device Installation Steps

Plug the device into your vehicle's OBD II port, or use an adapter where needed. No antenna, no wire-splicing, and it auto-calibrates in any orientation. Most GO installs take minutes with no installer and no appointment: you plug in, listen for the beeps, and call us to confirm it is reporting.

  1. Record the serial number. The port is typically beneath the dashboard, at or below knee level on the driver's side.
  2. Inspect and connect. Align the device connector with the port and push firmly until fully seated. Six quick beeps indicate connection.
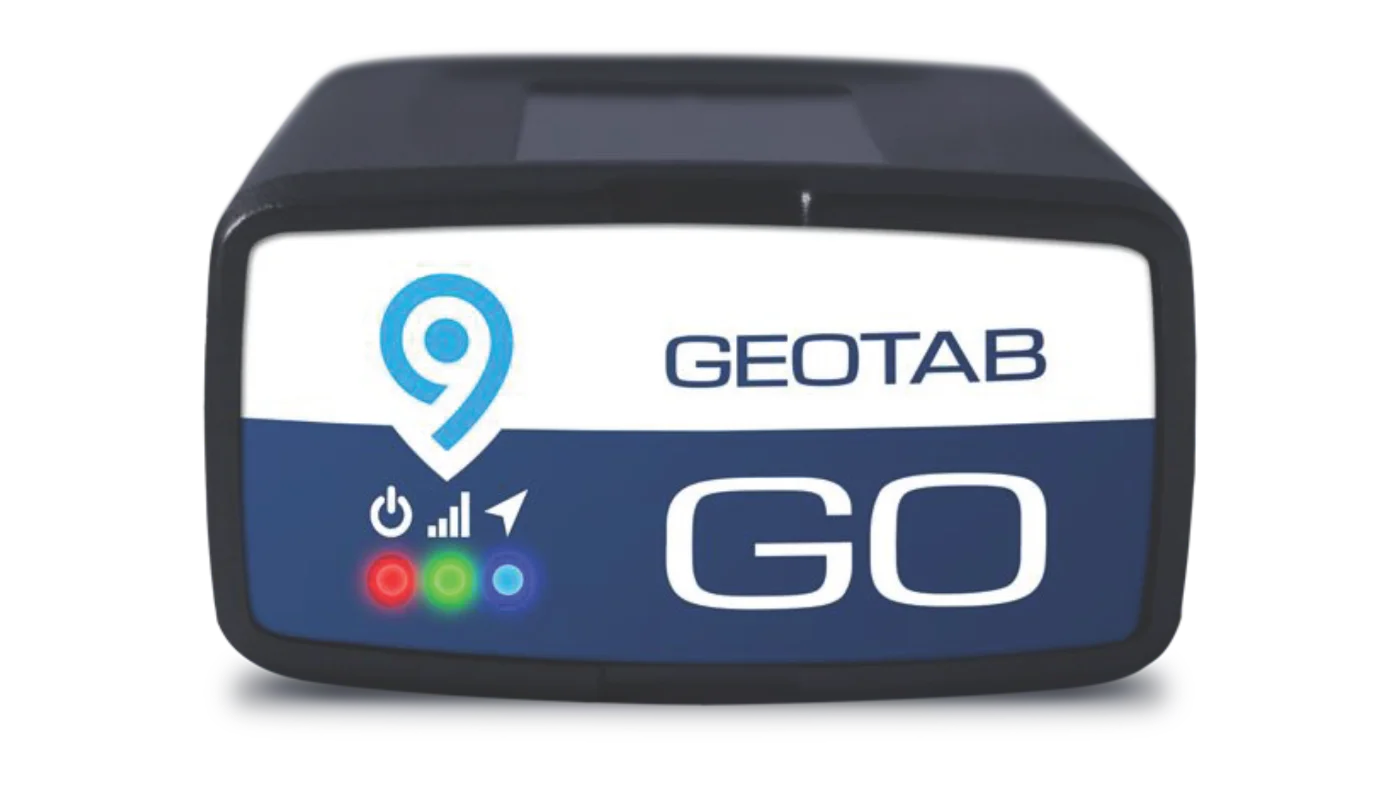
  3. Check the LED lights. Red: device configuration. Green: cellular network. Blue: GPS network. LEDs blink during setup and turn solid once complete. Initial setup can take 10 to 15 minutes.
  4. Listen for 10 quick beeps. The sequence plus solid green and blue means fully connected. Secure the device with a cable tie to prevent vibration or accidental disconnection.
  5. Position correctly. If using an extension harness under the dash, keep the label and antenna side facing upward toward the sky for optimal GPS.
  6. Verify communication. Contact GPSFMS and we will confirm status and communication to your database.
Geotab GO9 device

Common Troubleshooting

No lights or power

Make sure the device is firmly plugged into the diagnostic port. Check for blown fuses or an inactive vehicle battery, and try another vehicle port.

Red light only, no cellular or GPS

The device may still be configuring. Wait 5 to 10 minutes, then unplug for 30 seconds and reconnect.

No GPS, blue light off

Relocate the device to reduce interference. Avoid installing beneath metal panels or near heavy wiring. With a harness, keep the antenna side facing upward toward the windshield or sky.

Detected but not reporting data

Contact support@gpsfms.com or call (877) 771-2236 and we will verify communication to your database.

Geotab GO Focus

GO Focus Camera Installation Steps

The camera auto-pairs with your GO device and self-calibrates once it is powered on. Because it wires into the GO device through the IOX port, GPSFMS coordinates a certified installer and confirms the camera is reporting before the job is done.

  1. Record the device serial number.
  2. Prepare the installation area. Choose a clean, dry windshield area that does not obstruct the driver's view, within the sweep of the wipers for clear recording.
  3. Mount the bracket. Remove the adhesive film and press the bracket firmly against the glass for at least 30 seconds.
  4. Attach the GO Focus unit. Slide it into the mounted bracket and tighten securely with the provided locking tool, stable and facing straight ahead.
  5. Connect to the GO device. Use the provided IOX cable. Confirm the GO device is not plugged into the vehicle before connecting, and route the cable neatly.
  6. Power on and verify. Turn the ignition on. The camera powers up with an audible chime and the LED shows activation status.
  7. Contact GPSFMS to confirm setup.
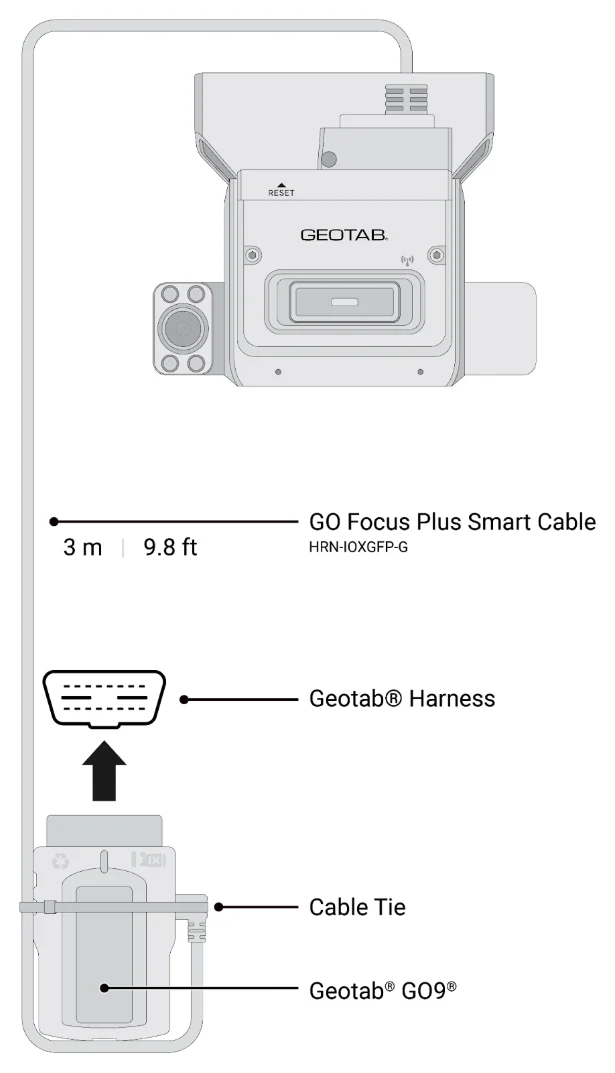
GO Focus Plus install diagram: the smart cable runs from the camera to the Geotab harness and GO9

Common Troubleshooting

No power or LED response

Check the camera is securely seated in its bracket, the IOX cable connection is solid, and the GO device is powered and communicating.

Detected but not reporting data

Confirm both the GO device and GO Focus serial numbers are registered in MyGeotab, then contact GPSFMS to verify data sync.

Flashing red light, communication failure

Check the IOX cable is properly connected and free of damage. Re-seat both ends and restart the vehicle. If it persists, contact GPSFMS.

Calibration issues

Press and hold the red camera SOS button for 5 seconds to re-enable Wi-Fi pairing mode. GPSFMS can remotely guide calibration.

Geotab GO Rugged

GO Rugged Installation Steps

GO Rugged is sealed and hardened for off-road and outdoor equipment, with IP68/IP69K-rated connectors. Because it is a hardwired install, GPSFMS coordinates a certified installer and confirms it is reporting before you sign off.

  1. Record the device serial number printed on the GO Rugged label. GPSFMS needs it to confirm communication after setup.
  2. Inspect the vehicle and device. Equipment should be in good working order with no active dashboard alerts, and the harness free of damage.
  3. Select the correct harness. Specialized weatherproof harnesses vary by equipment. Contact GPSFMS before install to confirm the correct harness and configuration.
  4. Mount the device securely. Choose a location shielded from water spray, debris, and vibration, with the label facing upward for the strongest GPS. Secure the device and harness with cable ties or brackets, never hanging loose.
  5. Connect power and ground. Use the approved harness to the vehicle's 12V or 24V power and ground. Avoid sharp edges or heat when routing. The device auto-calibrates when powered.
  6. Power up and verify. Six short beeps confirm a successful startup. Contact GPSFMS to confirm communication.
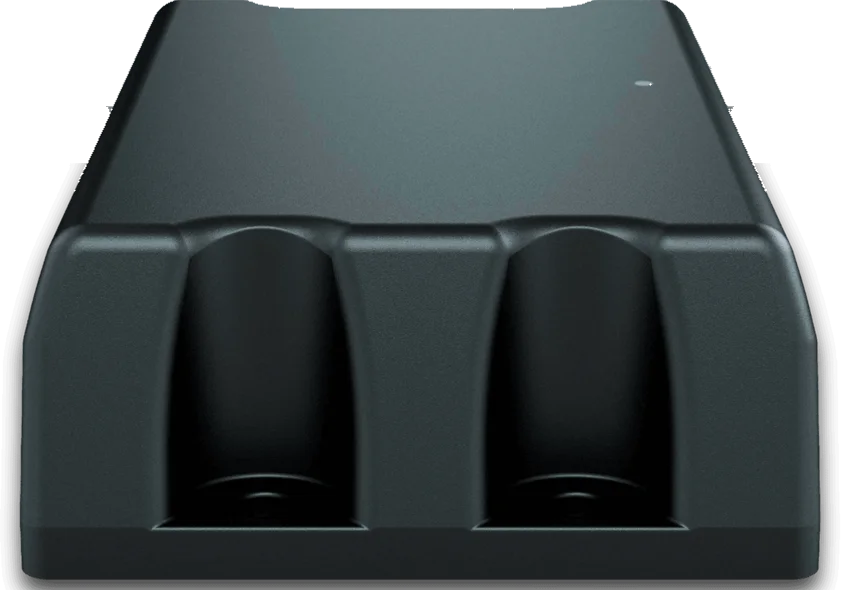
Geotab GO Rugged device

Common Troubleshooting

No beeps or power

Check the harness is securely connected and power is reaching the device. Look for a blown fuse or inactive battery, and inspect the harness connector for dirt, corrosion, or loose pins.

Detected but not reporting data

Verify power and ground connections are tight, confirm the device is registered to the correct vehicle in MyGeotab, then restart the vehicle and recheck.

Intermittent signal or connectivity drops

Avoid mounting near heavy wiring, metal panels, or high-vibration zones. Inspect for damaged cables or loose mounts. GPSFMS can remotely verify the network connection and assist with placement.

Device offline or unresponsive

Wait up to 15 minutes for first-time setup. If still offline, contact GPSFMS Support at support@gpsfms.com or (877) 771-2236.

Not sure which harness or install path fits? We confirm it before anything ships

Geotab GO Anywhere

GO Anywhere Activation Steps

No wiring, no charging, no tools. Attach it, activate it, and it reports for 3 to 5 years on the base GO Anywhere's 3,100 mAh battery.

  1. Record the device serial number.
  2. Prepare the asset surface. Clean, flat, and dry, with the label facing upward and a clear view of the sky.
  3. Mount the device securely. Use the included magnetic base or industrial adhesive. For trailers, equipment, and vehicles, secure with screws, adhesive, or brackets. Magnetic mounts are not suitable for highway use due to vibration and detachment risk.
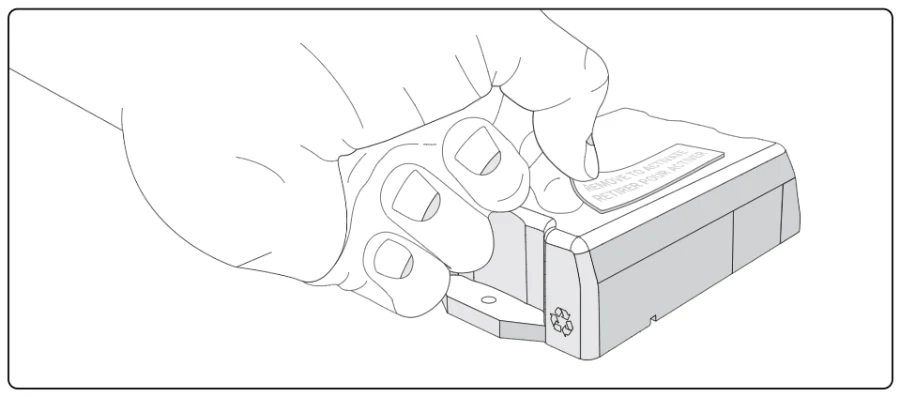
  4. Activate the device. Remove the magnet from the bottom to power on. The LED beneath the label lights up. Activate outdoors or near clear sky for strong GPS and LTE.
  5. Confirm activation and communication. Contact GPSFMS and we will verify it is reporting.
  6. Position and secure the final installation.
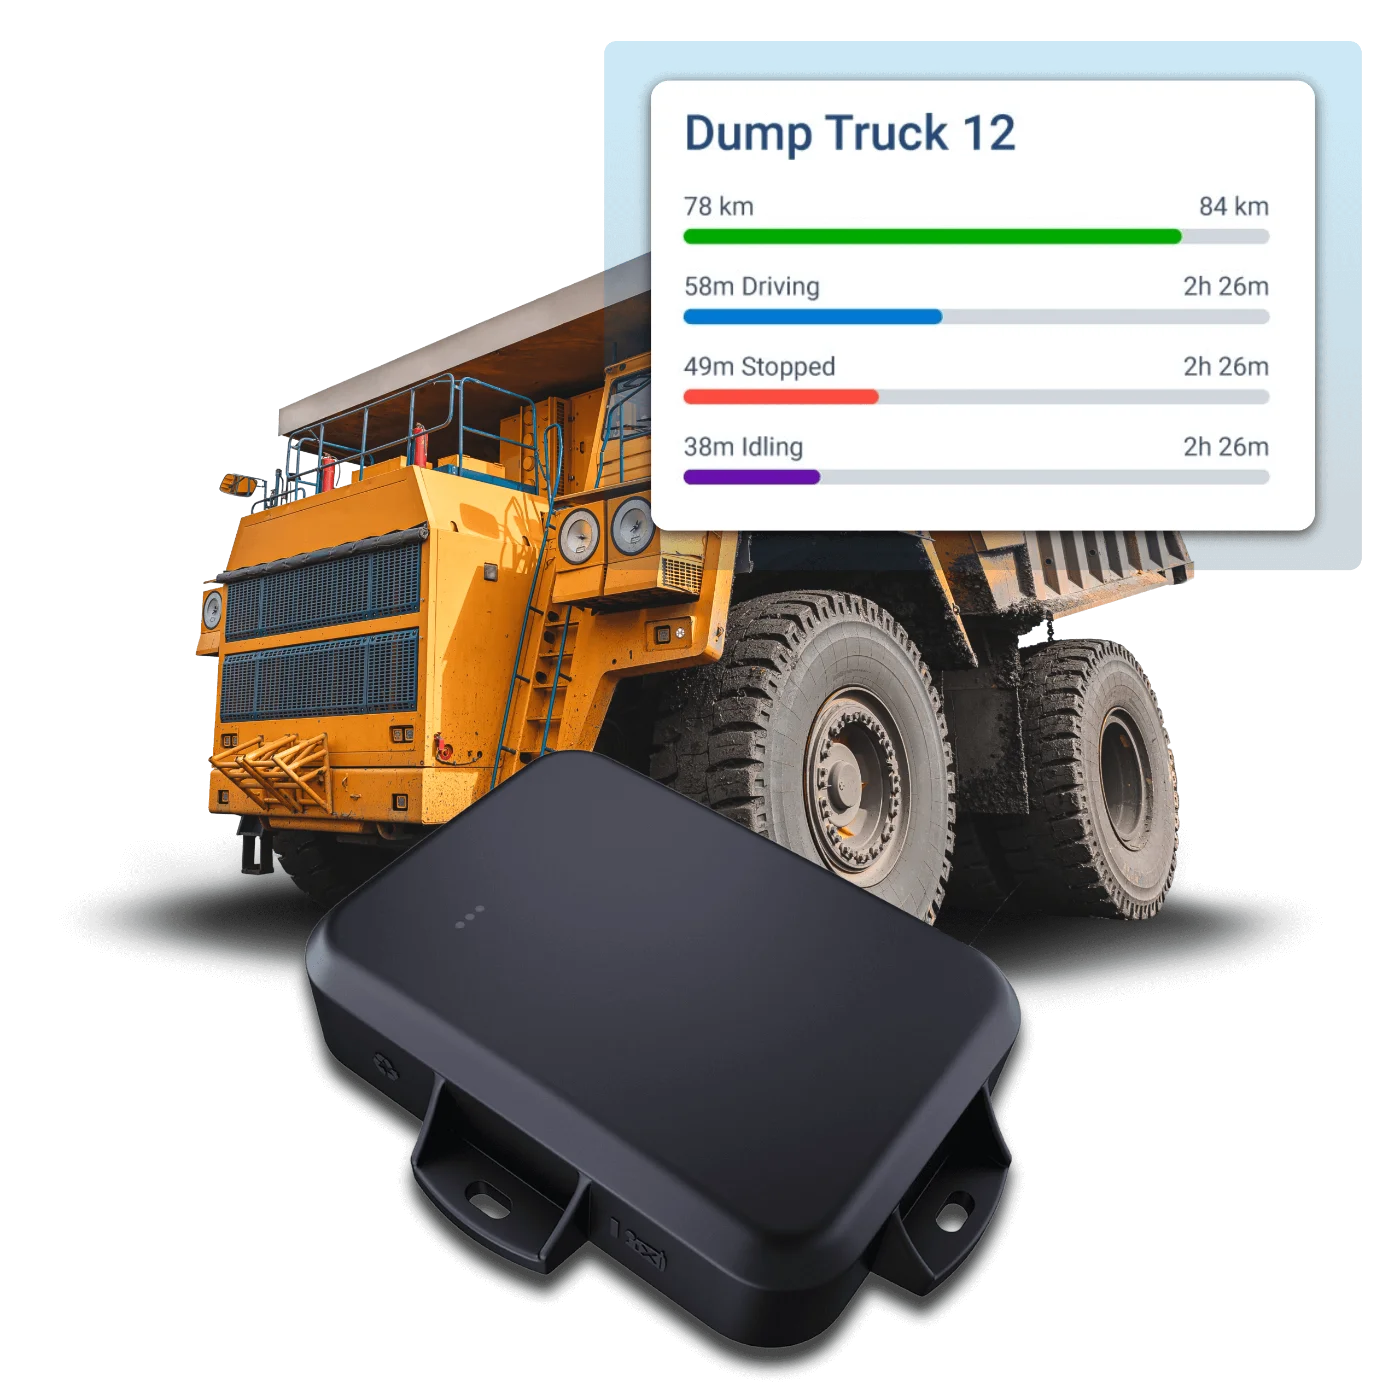
Geotab GO Anywhere asset tracker

Common Troubleshooting

Not powering on, no LED

Confirm the activation magnet is fully removed and move outdoors for strong GPS. Contact GPSFMS if no LED appears within 1 to 2 minutes.

Detected but not reporting data

Verify signal coverage and placement with the label facing the sky, and confirm the serial number is correctly added to MyGeotab. Reapply the magnet for 5 seconds, then remove it to retry activation.

Frequent offline alerts or data gaps

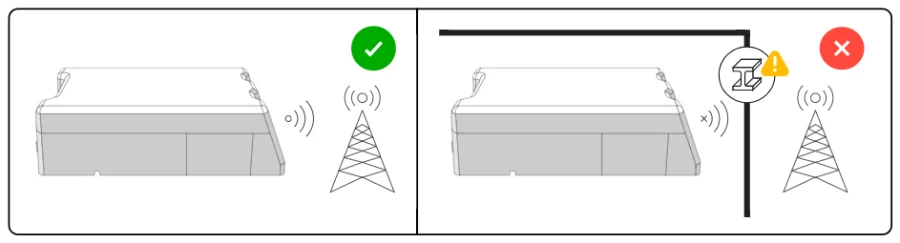
Avoid mounting beneath metal panels or in poor-signal areas, and keep the device stationary during activation. GPSFMS can verify connectivity remotely and suggest optimized placement.

Battery or coverage concerns

If the device reports low battery or stops updating, contact GPSFMS for a diagnostic review and replacement options.

Pulling the GO Anywhere activation strip
1 · ActivateOutside, pull the magnetic strip. The LED flashes and it is live.
Mount with a clear view of the sky, not boxed in by metal
2 · Pick the spotClear view of the sky, away from heavy metal enclosures.
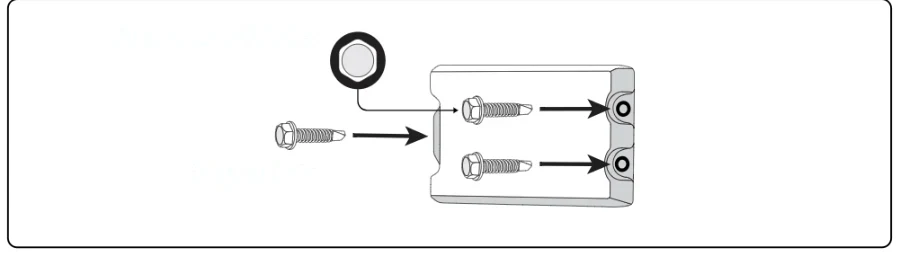
Mounting the GO Anywhere with two hex screws
3a · Screw it downTwo self-tapping screws with a 5/16" hex socket, 16 in-lbs.
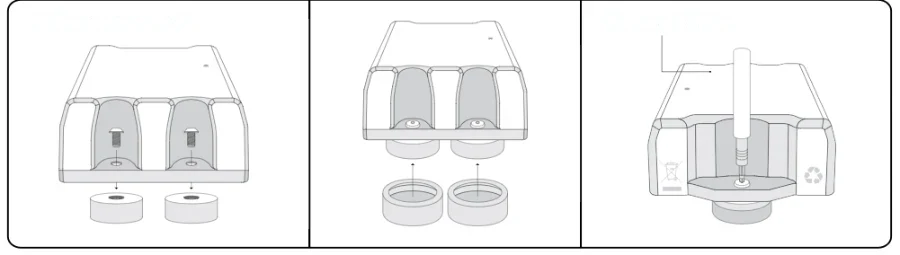
Screw-in magnet mounts on the GO Anywhere base
3b · Or go magneticScrew-in magnet pucks grip steel surfaces, no drilling.

Cameras and add-ons

Adding IOX Add-Ons Without Breaking What Works

Every add-on, camera, driver ID reader, spoken-alert speaker, or sensor interface connects through the GO device's IOX port and daisy-chains, so one clean install carries the whole stack. The rules that keep it clean:

  • Unplug first. Disconnect the GO device before connecting any IOX, then reconnect and let it reconfigure.
  • Camera goes last. A GO Focus camera passes power and data through and can daisy-chain up to 6 other IOX devices, but the camera itself goes last in the chain.
  • One shunt survives. Each IOX ships with a termination shunt; in a chain, only the last device keeps it.
  • Professional hands. IOX add-ons are professionally installed by a certified installer. GPSFMS coordinates that, and we verify the whole chain is reporting before the job is called done.
  • Quick self-checks. A valid tap on the NFC driver ID reader flashes the green LED twice with a single beep, and GO TALK has a test button in MyGeotab's Audio feedback tab that speaks the word "Test" in your chosen language.

After The Install

The Watchdog Keeps Counting

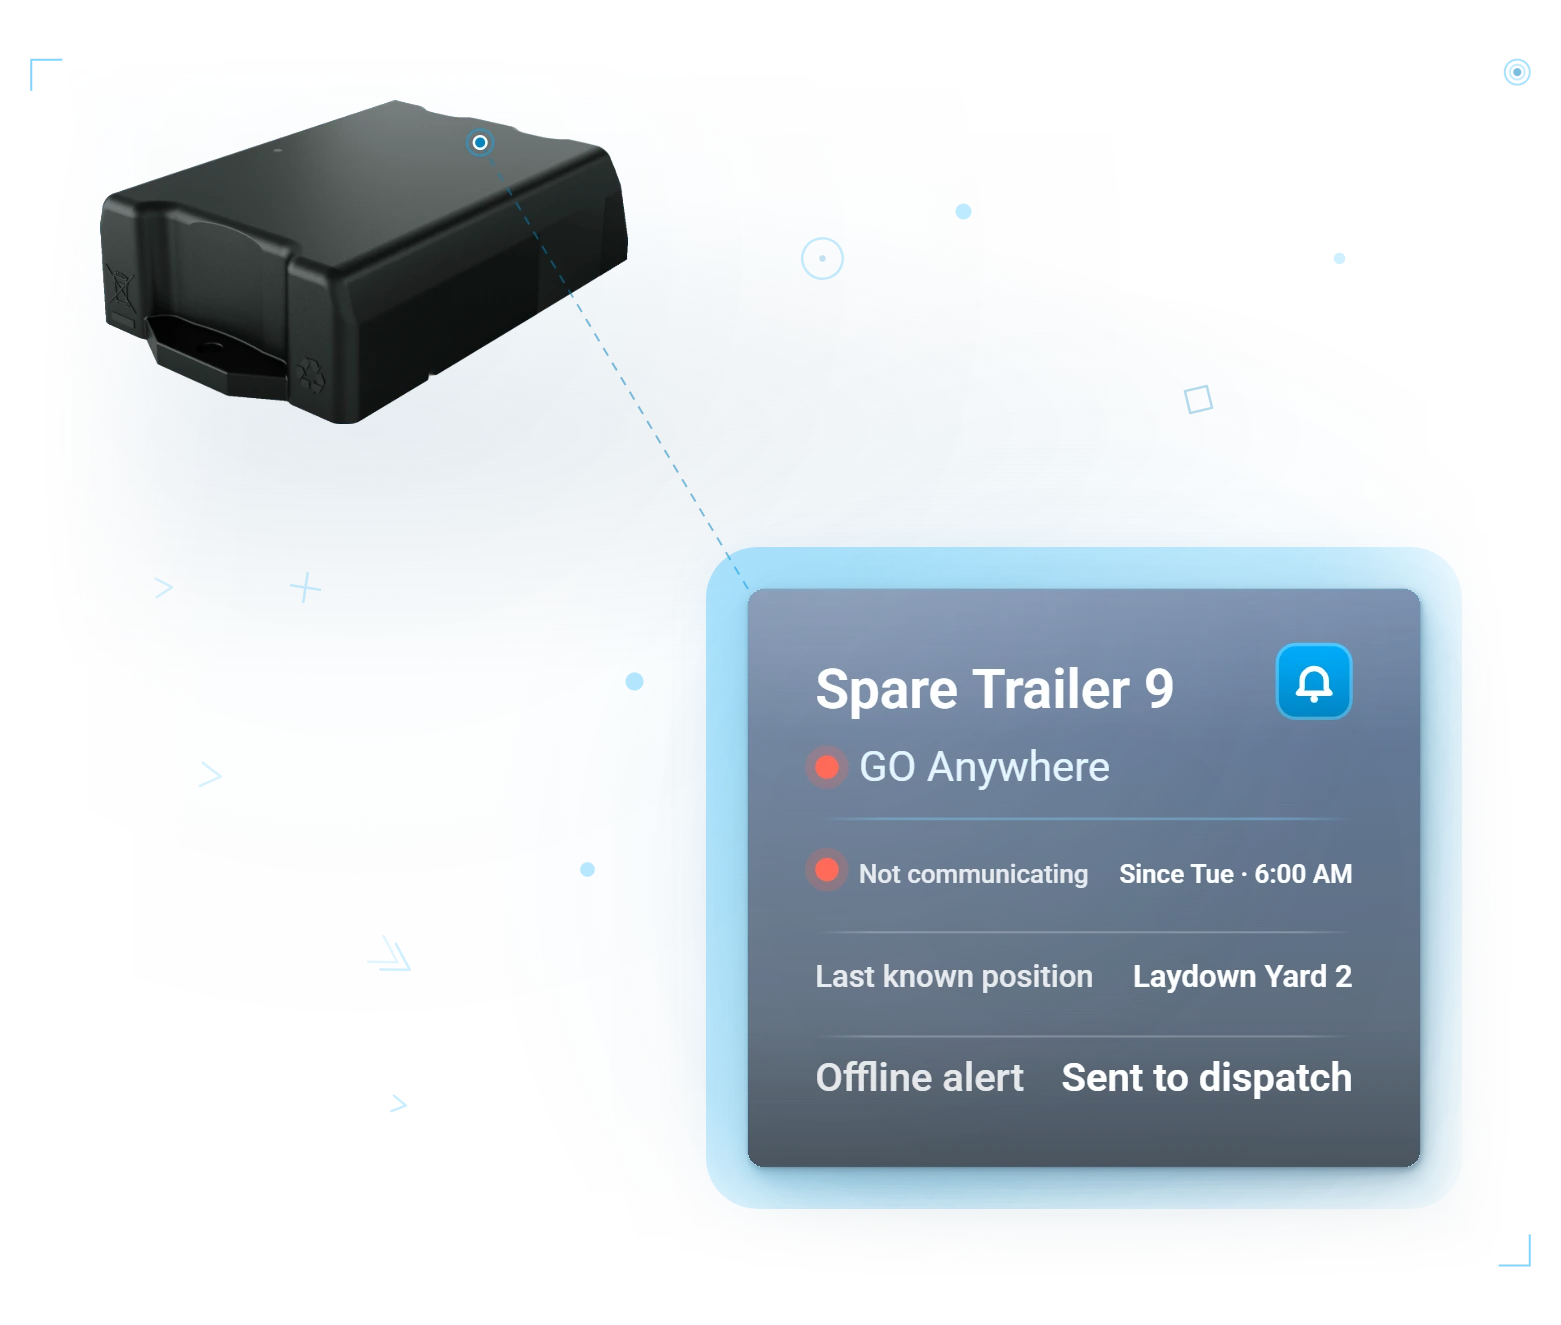
Every device reports in nightly. Offline units surface on their own, before anyone has to ask.

Questions

Install Questions, Answered Straight

Can my own guys install these, or do we need installers?

GO devices are genuinely self-install on most light-duty vehicles: plug in, listen for the beeps, call us to verify. IOX add-ons, cameras, and GO Rugged harness installs are professional jobs, and we coordinate certified installers when your fleet needs them.

What information do you need from me before shipping?

Vehicle make, model, and year, per unit. That is enough to confirm the device, the harness or adapter if any, and the configuration, so what arrives matches what is in your yard.

We are replacing another provider's trackers. Anything to watch?

Yes: do not reuse the old provider's cables. Devices only ship and install with Geotab-approved harnesses, and if you are coming off older GO8-era hardware, the harness gets replaced along with the device.

“Phenomenal staff training and technical support! When we need assistance, someone has always been available to take our call.”
Lake Murray Environmental Services, Gilbert, SC

Stuck on an Install? Call Us.

A real person picks up, verifies your device is communicating, and stays on the line until it is.